Wednesday, 10 October 2018

How to handle unexpected popup / alert in Selenium

How to handle unexpected popup / alert in Selenium?


Here, what I mean by unexpected popup / alert is you will see in some applications popups come unexpectedly and you can't expect the sequence of step when it will come in Application under test. So this is the challenge we have to handle that comes any time in the screen. 

We can handle unexpected popup / alerts using Selenium Listeners. Below steps can be followed. 

1. Create a class with any name for eg: WebListen.java implementing WebDriverEventListener (Interface)
2. Create method related to popupHandler / alertHandler in the same class that is created in (1 - WebListen.java ). 

public void checkAlert() {
    try {
        WebDriverWait wait = new WebDriverWait(driver, 2);
        wait.until(ExpectedConditions.alertIsPresent());
        Alert alert = driver.switchTo().alert();
        alert.accept();
    } catch (Exception e) {
        //exception handling
    e.printStackTrace();
    System.out.println("In alert hanlder");
    }
}

OR
public void checkPopup(WebDriver driver) {
    try {
        WebDriverWait wait = new WebDriverWait(driver,5);
        WebElement skip_link= driver.findElement(By.linkText("Skip"));
        wait.until(ExpectedConditions.elementToBeClickable(skip_link));
        skip_link.click();
    } catch (Exception e) {
        //exception handling
    System.out.println(e.getMessage());
    System.out.println("In popup hanlder");
    }
}

Depending on your project requirement / scenario based on the alert / popup object properties you have. 

Now call these methods in overridden methods wherever you think is applicable. 

For eg: afterChangeValueOf(), beforeChangeValueOf ()

as below: 

@Override
public void afterChangeValueOf(WebElement arg0, WebDriver arg1, CharSequence[] arg2) {
// TODO Auto-generated method stub
System.out.println("afterChangeValueOf");
checkPopup(driver);
}

@Override
public void beforeChangeValueOf(WebElement arg0, WebDriver arg1, CharSequence[] arg2) {
// TODO Auto-generated method stub
System.out.println("beforeChangeValueOf");
checkPopup(driver);
}
or any other method like beforeClick, beforeAlert and so on. 

What this means is beforeClick / beforeAlert or any other event is going to be occurred first you want to check whether alert or popup is there. If yes, you want to handle it and then move ahead. 


Now we need to use this listener in our test class. 

3. Use EventFiringWebDriver which is a class to register listener events. 

EventFiringWebDriver event1= new EventFiringWebDriver(driver);

// where driver is your driver instance. 

WebListen listen= new WebListen (event1);

// where WebListen is the class implementing WebDriverEventListener

event1.register(listen);

// use event1 ref variable going forward. 

event1.get("http://www.sample.demo.com");
event1.manage().window().maximize();
event1.manage().timeouts().implicitlyWait(20, TimeUnit.SECONDS);
event1.findElement(By.cssSelector("input[id = 'LoginForm_username']")).sendKeys("admin");
// here internally check for popup / alert will happen
event1.findElement(By.cssSelector("input[id = 'LoginForm_password']")).sendKeys("admin");
// here internally check for popup / alert will happen
event1.findElement(By.cssSelector("#Login > span.z-label")).click();

event1.unregister(listen);

This way your code will handle any popup / alert that is coming in AUT. 

if you have any questions about this do write in comment below. 

Hope this blog has been useful to you. If yes do follow my blogs by entering your email by 
clicking on "Follow" (blue) button. 

You can as well explore my 

Youtube Channel: https://www.youtube.com/user/srinivaskinik

And 

facebook page: https://www.facebook.com/srinivaskinikalmady/


Thank you. 

Sunday, 7 October 2018

Using Verify statements instead of Assert in Test NG

Using Verify statements instead of Assert in Test NG


Often we see, when we use Assert statement of TestNG... if test fails it terminates there and starts new test.
If we have requirement to continue executing test even verification failed (marking overall result as failed), then we can use Verify statements.  It can be accomplished as follows. 

First create a Class - TestMethodErrorBuffer with following methods. 

Mainly to get, set and remove testErrorBuffer. 


// thread safe while running tests in parallel
    private static ThreadLocal<List<Throwable>> testErrorBuffer = 
new ThreadLocal<List<Throwable>>();
     
    static List<Throwable> get(){
        return testErrorBuffer.get();
    }
     
    static void set(List<Throwable> errorBuffer){
        testErrorBuffer.set(errorBuffer);
    }
     
    static void remove(){
        testErrorBuffer.remove();
    }

Secondly create a class called "Verify" - define all methods related to Verify. 
Note here: for every method for eg:- verifyTrue() we are internally calling Assert method 
inside try catch block and if there is a exception we are adding it to ErrorBuffer. 

import org.testng.Assert;

public class Verify {
 
    protected Verify() {
        // hide constructor
    }
 
    static public void verifyTrue(boolean condition, String message) {        
        try{
            Assert.assertTrue(condition, message);
        }catch(AssertionError e){
            addToErrorBuffer(e);
        }         
    }
 
    static public void verifyFalse(boolean condition, String message) {
        try{
            Assert.assertFalse(condition, message);
        }catch(AssertionError e){
            addToErrorBuffer(e);
        }
    }
 
    static public void verifyEquals(Object actual, Object expected, String message) {
        try{
            Assert.assertEquals(actual, expected, message);
        }catch(AssertionError e){
            addToErrorBuffer(e);
        }
    }
 
    public static void verifyNotSame(Object actual1, Object actual2, String message) {
        try{
            Assert.assertNotSame(actual1,actual2,message);
        }catch(AssertionError e){
            addToErrorBuffer(e);
        }
    }
    
    public static void verifySame(Object actual1, Object actual2, String message) {
        try{
            Assert.assertSame(actual1,actual2,message);
        }catch(AssertionError e){
            addToErrorBuffer(e);
        }
    }
    
    public static void verifyNotNull(Object object, String message) {
        try{
            Assert.assertNotNull(object,message);
        }catch(AssertionError e){
            addToErrorBuffer(e);
        }
    }
    
    public static void verifyNull(Object object,  String message) {
        try{
            Assert.assertNull(object,message);
        }catch(AssertionError e){
            addToErrorBuffer(e);
        }
    }


    private static void addToErrorBuffer(AssertionError e){   
 
        try{                
 
            VerificationError verificationError = new VerificationError(e.getMessage());
 
            verificationError.setStackTrace(e.getStackTrace());
 
            TestMethodErrorBuffer.get().add(verificationError);
 
        }catch(NullPointerException ex){
 
            throw new RuntimeException("Exception at " + TestMethodListener.class.getName() );
        }
 
    }
}

Thirdly create a class called TestMethodListener implements IInvokedMethodListener
Here, in beforeInvocation we are going to define new ErrorBuffer for every test method. 
in afterInvocation set result and append all the results obtained from verify failures. 


import java.util.ArrayList;
import java.util.List;
 
import org.testng.IInvokedMethod;
import org.testng.IInvokedMethodListener;
import org.testng.ITestResult;
import org.testng.internal.Utils;
 
public class TestMethodListener implements IInvokedMethodListener{
 
    
    public void beforeInvocation(IInvokedMethod method, ITestResult testResult) {
 
        if(method.isTestMethod()){  
             
            if(TestMethodErrorBuffer.get()!=null){
                throw new RuntimeException("Stale error buffer detected!");
            }
             
            TestMethodErrorBuffer.set(new ArrayList<Throwable>()); 
// each test method will have its own error buffer
        }
 
    }
 
   
    public void afterInvocation(IInvokedMethod method, ITestResult testResult) {
 
        if(method.isTestMethod()){
 
            List<Throwable> lThrowable = TestMethodErrorBuffer.get();
 
            /* if there are verification failures */
            if(lThrowable.size() > 0){
 
                /* set test result to failure */
                testResult.setStatus(ITestResult.FAILURE);
 
                /* if there is assertion error/exception then add it to throwable list */
                if(testResult.getThrowable() != null){
                    lThrowable.add(testResult.getThrowable());
                }
 
                int size = lThrowable.size();
 
                /* if there is only one throwable then set it directly to test result */
                if(size == 1){
                    testResult.setThrowable(lThrowable.get(0));
                }else{
 
                    StringBuffer failureMessage = new StringBuffer("Multiple failures (")
.append(size).append(")\n");
                    StringBuffer fullStack = new StringBuffer();
 
                    for(int i =0 ; i < size-1; i++){ 
                        failureMessage.append("(").append(i+1).append(")")
.append(lThrowable.get(i).getClass().getName()).append(":").append(lThrowable.get(i).
getMessage()).append("\n");                      
                        fullStack.append("Failure ").append(i+1).append(" of ").
append(size).append("\n");  
                        fullStack.append(Utils.stackTrace(lThrowable.get(i),false)[1]).
append("\n");
                    }
 
                    fullStack.append("Failure ").append(size).append(" of ").
append(size).append("\n");
                    Throwable last = lThrowable.get(size-1);                    
                    failureMessage.append("(").append(size).append(")").
append(last.getClass().getName()).append(":").append(last.getMessage()).append("\n\n");
                     
                    fullStack.append(last.toString());
 
                    testResult.setThrowable(new Throwable(failureMessage.toString() + 
fullStack.toString()));
                    testResult.getThrowable().setStackTrace(last.getStackTrace());
                }
 
            }
             
            TestMethodErrorBuffer.remove(); // remove stale
             
        }
    }
 
}

Finally create a class called VerificationError  which extends Error 


public class VerificationError extends Error{
 
    private static final long serialVersionUID = 8247563849457669512L;
 
    public VerificationError(String message){
        super(message);
    }
     
}


Now you can use TestMethodListener in Test NG class by providing @Listeners annotation 
or in Test NG XML

@Listeners(TestMethodListener.class)
public class TestNG {
 
 @Test
 public void test1()
 {
  Verify.verifyFalse(true, "msg1");
  
  Verify.verifyEquals("tes1", "test2", "test2 doesn't match"); 
 }
 
 @Test
 public void test2()
 {
  Verify.verifyFalse(true, "msg2");
  
  Verify.verifyEquals("tes3", "test4", "test4 doesn't match"); 
 }

}

This will be the sample output for above test class. 

FAILED: test1
java.lang.Throwable: Multiple failures (2)
(1)listeners.VerificationError:msg1 expected [false] but found [true]
(2)listeners.VerificationError:test2 doesn't match expected [test2] but found [tes1]

FAILED: test2
java.lang.Throwable: Multiple failures (2)
(1)listeners.VerificationError:msg2 expected [false] but found [true]
(2)listeners.VerificationError:test4 doesn't match expected [test4] but found [tes3]

Note in the output, even though one verification got failed from verify other verify statement also 
got executed unlike Assert. And finally result "failed" is set on Test method. 

Hope this blog has been useful to you. If yes do follow my blogs by entering your email by 
clicking on "Follow" (blue) button. 

You can as well explore my 

Youtube Channel: https://www.youtube.com/user/srinivaskinik

And 

facebook page: https://www.facebook.com/srinivaskinikalmady/


Thursday, 4 October 2018

How to run 2 testNG xml suites in sequential mode or parallel mode using batch file


How to run 2 testNG xml suites in sequential mode or parallel mode using batch file?


Let us consider below to be the content of 2 Test NG xmls

<!DOCTYPE suite SYSTEM "http://testng.org/testng-1.0.dtd" >
<suite name="mySuite1"  thread-count="3">
<test name = "myTest">
<classes>
<class name="testNG.Test1"/>
</classes>
</test>
</suite>


<!DOCTYPE suite SYSTEM "http://testng.org/testng-1.0.dtd" >
<suite name="mySuite2"  thread-count="3">
<test name = "myTest2">
<classes>
<class name="testNG.Test2"/>
</classes>
</test>
</suite>


To run these 2 xmls in sequence, we can write a batch file with below content: 

set classpath="Path of Test NG libs\*;
cd directory classpath of TestNG class files
java org.testng.TestNG  TestNG_Parallel.xml TestNG_Parallel2.xml


Note here command java org.testng.TestNG xml1 xml2 will run suites in sequence. 

classpath = Here you need to set path of all libs that you are using in project. 
cd  directory must point to the class files path. 


Here is the sample output: 

Thread ID ------------1
test1

===============================================
mySuite1
Total tests run: 1, Failures: 0, Skips: 0
===============================================

Thread ID ------------1
test2
Thread ID ------------1
test3

===============================================
mySuite2
Total tests run: 2, Failures: 0, Skips: 0
===============================================

Note the Thread ID same for all tests because same thread was used for execution (Sequential). 

Now to run 2 xml suites in parallel just add -suitethreadpoolsize 2 option. So batch file would like like this: 

set classpath="Path of Test NG libs\*;
cd directory classpath of TestNG class files
java org.testng.TestNG   -suitethreadpoolsize 2 TestNG_Parallel.xml TestNG_Parallel2.xml

Below is the sample output: 

Thread ID ------------9
Thread ID ------------8
test1
test2
Thread ID ------------9
test3

===============================================
mySuite2
Total tests run: 2, Failures: 0, Skips: 0
===============================================


===============================================
mySuite1
Total tests run: 1, Failures: 0, Skips: 0
===============================================


Note the Thread ID is different for some tests because execution happened in parallel ( 8 and 9 ). 


Hope this blog has been useful to you.

Youtube channel: https://www.youtube.com/user/srinivaskinik
Facebook page: https://www.facebook.com/srinivaskinikalmady/

Sunday, 30 September 2018

How to achieve parallel execution in Test NG

In this blog, we will discuss and learn various options available in Test NG to execute in parallel.

Let us consider below sample Test NG xml:

<!DOCTYPE suite SYSTEM "http://testng.org/testng-1.0.dtd" >
<suite name="mySuite">
<test name="myTest">
<classes>
<class name="testNG.Test1"/>
<class name="testNG.Test2"/>
</classes>
</test>
</suite>

public class Test1 {

@Test
public void test1()
{
System.out.println("Thread ID ------------"+Thread.currentThread().getId());
System.out.println("test1");
}


}

public class Test2 {

@Test
public void test2()
{

System.out.println("Thread ID ------------"+Thread.currentThread().getId());
System.out.println("test2");

}

When we execute above suite, below is the output displayed. (output is in Blue)

[RemoteTestNG] detected TestNG version 6.14.2
Thread ID ------------1
test1
Thread ID ------------1
test2

===============================================
mySuite
Total tests run: 2, Failures: 0, Skips: 0
===============================================

Note here, for both the methods executed, Thread ID returned is one because, it ran tests in single thread (sequential execution).

Test NG provides options to run methods, tests, classes in different threads by using parallel attribute as given below:


<suite name="mySuite" parallel="methods" thread-count="2">
<suite name="mySuite" parallel="tests" thread-count="2">
<suite name="mySuite" parallel="classes" thread-count="2">
<suite name="mySuite" parallel="instances" thread-count="2">

parallel="methods": TestNG will run all your test methods in separate threads. Dependent methods will also run in separate threads but they will respect the order that you specified.

parallel="tests": TestNG will run all the methods in the same <test> tag in the same thread, but each <test> tag will be in a separate thread. This allows you to group all your classes that are not thread safe in the same <test> and guarantee they will all run in the same thread while taking advantage of TestNG using as many threads as possible to run your tests.

parallel="classes": TestNG will run all the methods in the same class in the same thread, but each class will be run in a separate thread.

parallel="instances": TestNG will run all the methods in the same instance in the same thread, but two methods on two different instances will be running in different threads.


Let us modify our xml to be like this: 

<!DOCTYPE suite SYSTEM "http://testng.org/testng-1.0.dtd" >
<suite name="mySuite" parallel="tests" thread-count="3">
<test name = "myTest">
<classes>
<class name="testNG.Test1"/>
</classes>
</test>
<test name = "myTest2">
<classes>
<class name="testNG.Test2"/>
</classes>
</test>
</suite>

Note changes: parallel= "tests" that means we want to execute our tests defined as myTest and myTest2 in parallel. and thread-count="3" totally there will be 3 threads available for use.

When I execute this test below is the output:

[RemoteTestNG] detected TestNG version 6.14.2
Thread ID ------------10
test2
Thread ID ------------9
test1

===============================================
mySuite
Total tests run: 2, Failures: 0, Skips: 0
===============================================

Output confirms that tests executed in parallel with different threads (thread ids).

Now, let us add one more method in Test2 class:

@Test
public void test3()
{

System.out.println("Thread ID ------------"+Thread.currentThread().getId());
System.out.println("test3");
}

Now let us execute same suite. Notice the output:

[RemoteTestNG] detected TestNG version 6.14.2
Thread ID ------------9
test1
Thread ID ------------10
test2
Thread ID ------------10
test3

===============================================
mySuite
Total tests run: 3, Failures: 0, Skips: 0
===============================================

Since test2 and test3 are methods inside myTest2 Test, they got executed in same thread.

Now let us modify parallel ="methods" in above xml. It is expected to run each method in different thread. Below is the output which confirms the same.

[RemoteTestNG] detected TestNG version 6.14.2
Thread ID ------------9
test1
Thread ID ------------10
test2
Thread ID ------------11
test3

===============================================
mySuite
Total tests run: 3, Failures: 0, Skips: 0
===============================================

Similarly parallel = "classes" can be used to run classes in parallel.

parallel="instances" would give below results:

[RemoteTestNG] detected TestNG version 6.14.2
Thread ID ------------9
test1
Thread ID ------------10
test2
Thread ID ------------10
test3

===============================================
mySuite
Total tests run: 3, Failures: 0, Skips: 0
===============================================

Because, methods in same instance are run in same thread, whereas methods in other instance got run in different thread. 

Hope this blog has been useful to you.

Youtube channel: https://www.youtube.com/user/srinivaskinik
Facebook page: https://www.facebook.com/srinivaskinikalmady/


Saturday, 22 September 2018

How to upload a file in Webpage, using Selenium without using other tools.

How to upload a file in Webpage, using Selenium without using other tools.

Let us take application in which you need to click on upload button and then upload a file to web application.


It can be achieved in Selenium using below steps:

1. Find the unique location for "Upload Files" button

2. Use sendKeys on the element by passing full file path.


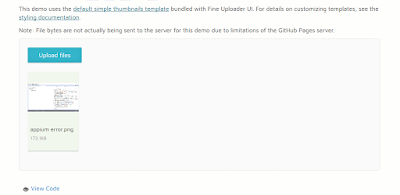
For eg: driver.findElement(By.xpath("//input[@title='file input']")).sendKeys("C:\\Users\\SrinivasKalmady\\Desktop\\appium error.png");


File will get uploaded:


Hope this blog has been useful to you.

Youtube channel: https://www.youtube.com/user/srinivaskinik
Facebook page: https://www.facebook.com/srinivaskinikalmady/


Thursday, 20 September 2018

How to resolve Exception in thread "main" java.lang.NoClassDefFoundError: org/apache/commons/compress/archivers/zip/ZipFile while reading data from Apache POI

How to resolve Exception in thread "main" java.lang.NoClassDefFoundError: org/apache/commons/compress/archivers/zip/ZipFile while reading data from Apache POI


Step1: Download Apache POI libraries from https://poi.apache.org/ For eg:
https://poi.apache.org/download.html#POI-4.0.0

.tar.gz or .zip depending on the Linux or Windows OS you are working respectively.


Step2: Extract downloaded files and import them in your eclipse project.
Step3: While executing sample code,

String projectDir=System.getProperty("user.dir");
File file = new File(projectDir+"/Resources/TestData.xlsx");

InputStream is = new FileInputStream(file);

XSSFWorkbook workbook = new XSSFWorkbook(is);
XSSFSheet sheet = workbook.getSheet("Sheet1");


// index of rownos
int lastRowNum = sheet.getLastRowNum();

System.out.println(lastRowNum);

for(int i=0;i<=lastRowNum;i++)
{
XSSFRow row = sheet.getRow(i);

// cell count
short lastCellNum = row.getLastCellNum();

for(int j=0;j<lastCellNum;j++)
{
String excelData = row.getCell(j).toString();
System.out.println(excelData);

// XSSFCell cell = row.getCell(j);

//cell.setCellValue("data");

}
}


Error appears:

Exception in thread "main" java.lang.NoClassDefFoundError: org/apache/commons/compress/archivers/zip/ZipFile
at org.apache.poi.openxml4j.opc.OPCPackage.open(OPCPackage.java:298)
at org.apache.poi.ooxml.util.PackageHelper.open(PackageHelper.java:37)
at org.apache.poi.xssf.usermodel.XSSFWorkbook.<init>(XSSFWorkbook.java:307)
at datasource.Reading_XLS.main(Reading_XLS.java:24)
Caused by: java.lang.ClassNotFoundException: org.apache.commons.compress.archivers.zip.ZipFile
at java.net.URLClassLoader.findClass(Unknown Source)
at java.lang.ClassLoader.loadClass(Unknown Source)
at sun.misc.Launcher$AppClassLoader.loadClass(Unknown Source)
at java.lang.ClassLoader.loadClass(Unknown Source)
... 4 more


Step4: To resolve above problem, download Apache common compress jars from

https://commons.apache.org/proper/commons-compress/download_compress.cgi


Step5: Download and import "commons-compress-1.18.jar" in the eclipse project along with previously imported jars. 


Error no longer appears and data will be read / written from excel. 


Hope this blog has been useful to you.

Youtube channel: https://www.youtube.com/user/srinivaskinik
Facebook page: https://www.facebook.com/srinivaskinikalmady/


Saturday, 15 September 2018

Why in Selenium findElements is made to return List and not Set

First of all let us see what are the difference between List and Set in Java.

Both are Interfaces extending Collections interface.

Some of the most used implementations of List in Java are ArrayList, LinkedList.
Some of the most used implementations of Set in Java are HashSet, LinkedHashSet, TreeSet.

These are the characteristics of List:
* Is a dynamic array.
* Any elements in the list can be controlled using index.
* Allows duplicate values.
* Allows null values.

These are the characteristics of Set:
* Is a dynamic array.
* There is no index to control elements in Set.
* Does not allow duplicate values. If duplicate entry added, will ignore it.
* Some implementations such as HashSet and LinkedHashSet allow null values, whereas some implementations like TreeSet do not allow null values.

Now, In Selenium why driver.findElements() made to return List and not Set. Is because, only List allows duplicate values and not Set. There is a possibility that when we driver.findElements() there could be duplicate elements returned and as well sometimes no elements returned (null). So list is the best possible return type for findElements method.

Similarly, why driver.getWindowHandles(); is made to return Set. Is because, every window will have unique window handle and cannot be duplicate and cannot be null.

That is the reason why driver.findElements()  is made to return List and driver.getWindowHandles(); is made to return Set. 

Hope this blog has been useful to you.

Youtube channel: https://www.youtube.com/user/srinivaskinik
Facebook page: https://www.facebook.com/srinivaskinikalmady/

How to schedule RFT (Rational Functional Tester) scripts to run using Jenkins / schedule

How to schedule RFT (Rational Functional Tester) scripts to run using Jenkins / schedule 1. Create a batch file with following content ...