Thursday, 4 October 2018

How to run 2 testNG xml suites in sequential mode or parallel mode using batch file


How to run 2 testNG xml suites in sequential mode or parallel mode using batch file?


Let us consider below to be the content of 2 Test NG xmls

<!DOCTYPE suite SYSTEM "http://testng.org/testng-1.0.dtd" >
<suite name="mySuite1"  thread-count="3">
<test name = "myTest">
<classes>
<class name="testNG.Test1"/>
</classes>
</test>
</suite>


<!DOCTYPE suite SYSTEM "http://testng.org/testng-1.0.dtd" >
<suite name="mySuite2"  thread-count="3">
<test name = "myTest2">
<classes>
<class name="testNG.Test2"/>
</classes>
</test>
</suite>


To run these 2 xmls in sequence, we can write a batch file with below content: 

set classpath="Path of Test NG libs\*;
cd directory classpath of TestNG class files
java org.testng.TestNG  TestNG_Parallel.xml TestNG_Parallel2.xml


Note here command java org.testng.TestNG xml1 xml2 will run suites in sequence. 

classpath = Here you need to set path of all libs that you are using in project. 
cd  directory must point to the class files path. 


Here is the sample output: 

Thread ID ------------1
test1

===============================================
mySuite1
Total tests run: 1, Failures: 0, Skips: 0
===============================================

Thread ID ------------1
test2
Thread ID ------------1
test3

===============================================
mySuite2
Total tests run: 2, Failures: 0, Skips: 0
===============================================

Note the Thread ID same for all tests because same thread was used for execution (Sequential). 

Now to run 2 xml suites in parallel just add -suitethreadpoolsize 2 option. So batch file would like like this: 

set classpath="Path of Test NG libs\*;
cd directory classpath of TestNG class files
java org.testng.TestNG   -suitethreadpoolsize 2 TestNG_Parallel.xml TestNG_Parallel2.xml

Below is the sample output: 

Thread ID ------------9
Thread ID ------------8
test1
test2
Thread ID ------------9
test3

===============================================
mySuite2
Total tests run: 2, Failures: 0, Skips: 0
===============================================


===============================================
mySuite1
Total tests run: 1, Failures: 0, Skips: 0
===============================================


Note the Thread ID is different for some tests because execution happened in parallel ( 8 and 9 ). 


Hope this blog has been useful to you.

Youtube channel: https://www.youtube.com/user/srinivaskinik
Facebook page: https://www.facebook.com/srinivaskinikalmady/

Sunday, 30 September 2018

How to achieve parallel execution in Test NG

In this blog, we will discuss and learn various options available in Test NG to execute in parallel.

Let us consider below sample Test NG xml:

<!DOCTYPE suite SYSTEM "http://testng.org/testng-1.0.dtd" >
<suite name="mySuite">
<test name="myTest">
<classes>
<class name="testNG.Test1"/>
<class name="testNG.Test2"/>
</classes>
</test>
</suite>

public class Test1 {

@Test
public void test1()
{
System.out.println("Thread ID ------------"+Thread.currentThread().getId());
System.out.println("test1");
}


}

public class Test2 {

@Test
public void test2()
{

System.out.println("Thread ID ------------"+Thread.currentThread().getId());
System.out.println("test2");

}

When we execute above suite, below is the output displayed. (output is in Blue)

[RemoteTestNG] detected TestNG version 6.14.2
Thread ID ------------1
test1
Thread ID ------------1
test2

===============================================
mySuite
Total tests run: 2, Failures: 0, Skips: 0
===============================================

Note here, for both the methods executed, Thread ID returned is one because, it ran tests in single thread (sequential execution).

Test NG provides options to run methods, tests, classes in different threads by using parallel attribute as given below:


<suite name="mySuite" parallel="methods" thread-count="2">
<suite name="mySuite" parallel="tests" thread-count="2">
<suite name="mySuite" parallel="classes" thread-count="2">
<suite name="mySuite" parallel="instances" thread-count="2">

parallel="methods": TestNG will run all your test methods in separate threads. Dependent methods will also run in separate threads but they will respect the order that you specified.

parallel="tests": TestNG will run all the methods in the same <test> tag in the same thread, but each <test> tag will be in a separate thread. This allows you to group all your classes that are not thread safe in the same <test> and guarantee they will all run in the same thread while taking advantage of TestNG using as many threads as possible to run your tests.

parallel="classes": TestNG will run all the methods in the same class in the same thread, but each class will be run in a separate thread.

parallel="instances": TestNG will run all the methods in the same instance in the same thread, but two methods on two different instances will be running in different threads.


Let us modify our xml to be like this: 

<!DOCTYPE suite SYSTEM "http://testng.org/testng-1.0.dtd" >
<suite name="mySuite" parallel="tests" thread-count="3">
<test name = "myTest">
<classes>
<class name="testNG.Test1"/>
</classes>
</test>
<test name = "myTest2">
<classes>
<class name="testNG.Test2"/>
</classes>
</test>
</suite>

Note changes: parallel= "tests" that means we want to execute our tests defined as myTest and myTest2 in parallel. and thread-count="3" totally there will be 3 threads available for use.

When I execute this test below is the output:

[RemoteTestNG] detected TestNG version 6.14.2
Thread ID ------------10
test2
Thread ID ------------9
test1

===============================================
mySuite
Total tests run: 2, Failures: 0, Skips: 0
===============================================

Output confirms that tests executed in parallel with different threads (thread ids).

Now, let us add one more method in Test2 class:

@Test
public void test3()
{

System.out.println("Thread ID ------------"+Thread.currentThread().getId());
System.out.println("test3");
}

Now let us execute same suite. Notice the output:

[RemoteTestNG] detected TestNG version 6.14.2
Thread ID ------------9
test1
Thread ID ------------10
test2
Thread ID ------------10
test3

===============================================
mySuite
Total tests run: 3, Failures: 0, Skips: 0
===============================================

Since test2 and test3 are methods inside myTest2 Test, they got executed in same thread.

Now let us modify parallel ="methods" in above xml. It is expected to run each method in different thread. Below is the output which confirms the same.

[RemoteTestNG] detected TestNG version 6.14.2
Thread ID ------------9
test1
Thread ID ------------10
test2
Thread ID ------------11
test3

===============================================
mySuite
Total tests run: 3, Failures: 0, Skips: 0
===============================================

Similarly parallel = "classes" can be used to run classes in parallel.

parallel="instances" would give below results:

[RemoteTestNG] detected TestNG version 6.14.2
Thread ID ------------9
test1
Thread ID ------------10
test2
Thread ID ------------10
test3

===============================================
mySuite
Total tests run: 3, Failures: 0, Skips: 0
===============================================

Because, methods in same instance are run in same thread, whereas methods in other instance got run in different thread. 

Hope this blog has been useful to you.

Youtube channel: https://www.youtube.com/user/srinivaskinik
Facebook page: https://www.facebook.com/srinivaskinikalmady/




Saturday, 22 September 2018

How to upload a file in Webpage, using Selenium without using other tools.

How to upload a file in Webpage, using Selenium without using other tools.

Let us take application in which you need to click on upload button and then upload a file to web application.


It can be achieved in Selenium using below steps:

1. Find the unique location for "Upload Files" button

2. Use sendKeys on the element by passing full file path.


For eg: driver.findElement(By.xpath("//input[@title='file input']")).sendKeys("C:\\Users\\SrinivasKalmady\\Desktop\\appium error.png");


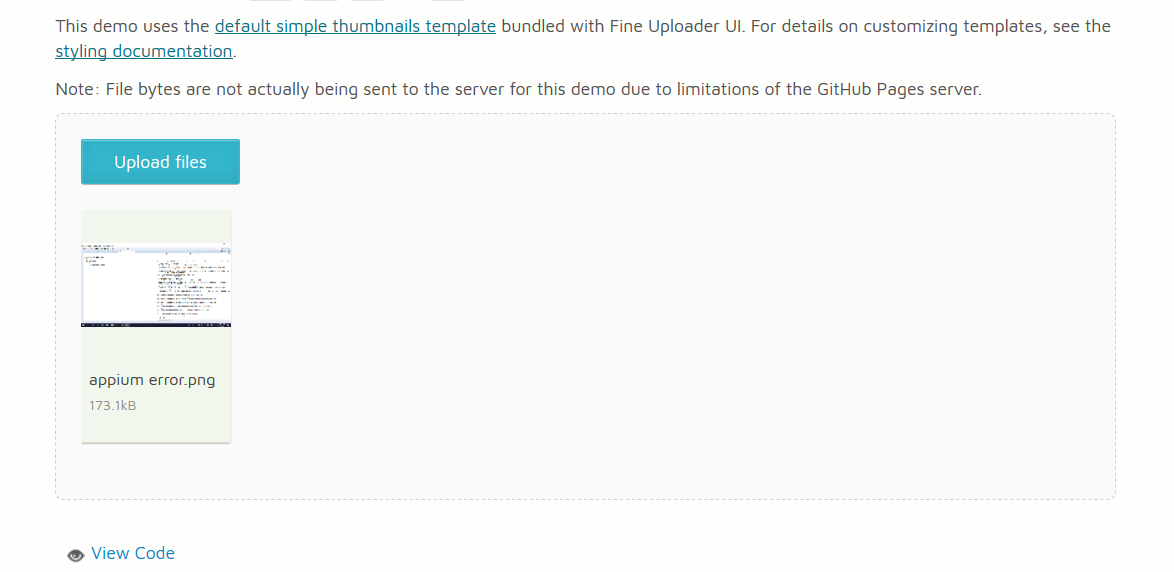
File will get uploaded:


Hope this blog has been useful to you.

Youtube channel: https://www.youtube.com/user/srinivaskinik
Facebook page: https://www.facebook.com/srinivaskinikalmady/


Thursday, 20 September 2018

How to resolve Exception in thread "main" java.lang.NoClassDefFoundError: org/apache/commons/compress/archivers/zip/ZipFile while reading data from Apache POI

How to resolve Exception in thread "main" java.lang.NoClassDefFoundError: org/apache/commons/compress/archivers/zip/ZipFile while reading data from Apache POI


Step1: Download Apache POI libraries from https://poi.apache.org/ For eg:
https://poi.apache.org/download.html#POI-4.0.0

.tar.gz or .zip depending on the Linux or Windows OS you are working respectively.


Step2: Extract downloaded files and import them in your eclipse project.
Step3: While executing sample code,

String projectDir=System.getProperty("user.dir");
File file = new File(projectDir+"/Resources/TestData.xlsx");

InputStream is = new FileInputStream(file);

XSSFWorkbook workbook = new XSSFWorkbook(is);
XSSFSheet sheet = workbook.getSheet("Sheet1");


// index of rownos
int lastRowNum = sheet.getLastRowNum();

System.out.println(lastRowNum);

for(int i=0;i<=lastRowNum;i++)
{
XSSFRow row = sheet.getRow(i);

// cell count
short lastCellNum = row.getLastCellNum();

for(int j=0;j<lastCellNum;j++)
{
String excelData = row.getCell(j).toString();
System.out.println(excelData);

// XSSFCell cell = row.getCell(j);

//cell.setCellValue("data");

}
}


Error appears:

Exception in thread "main" java.lang.NoClassDefFoundError: org/apache/commons/compress/archivers/zip/ZipFile
at org.apache.poi.openxml4j.opc.OPCPackage.open(OPCPackage.java:298)
at org.apache.poi.ooxml.util.PackageHelper.open(PackageHelper.java:37)
at org.apache.poi.xssf.usermodel.XSSFWorkbook.<init>(XSSFWorkbook.java:307)
at datasource.Reading_XLS.main(Reading_XLS.java:24)
Caused by: java.lang.ClassNotFoundException: org.apache.commons.compress.archivers.zip.ZipFile
at java.net.URLClassLoader.findClass(Unknown Source)
at java.lang.ClassLoader.loadClass(Unknown Source)
at sun.misc.Launcher$AppClassLoader.loadClass(Unknown Source)
at java.lang.ClassLoader.loadClass(Unknown Source)
... 4 more


Step4: To resolve above problem, download Apache common compress jars from

https://commons.apache.org/proper/commons-compress/download_compress.cgi


Step5: Download and import "commons-compress-1.18.jar" in the eclipse project along with previously imported jars. 


Error no longer appears and data will be read / written from excel. 


Hope this blog has been useful to you.

Youtube channel: https://www.youtube.com/user/srinivaskinik
Facebook page: https://www.facebook.com/srinivaskinikalmady/


Saturday, 15 September 2018

Why in Selenium findElements is made to return List and not Set

First of all let us see what are the difference between List and Set in Java.

Both are Interfaces extending Collections interface.

Some of the most used implementations of List in Java are ArrayList, LinkedList.
Some of the most used implementations of Set in Java are HashSet, LinkedHashSet, TreeSet.

These are the characteristics of List:
* Is a dynamic array.
* Any elements in the list can be controlled using index.
* Allows duplicate values.
* Allows null values.

These are the characteristics of Set:
* Is a dynamic array.
* There is no index to control elements in Set.
* Does not allow duplicate values. If duplicate entry added, will ignore it.
* Some implementations such as HashSet and LinkedHashSet allow null values, whereas some implementations like TreeSet do not allow null values.

Now, In Selenium why driver.findElements() made to return List and not Set. Is because, only List allows duplicate values and not Set. There is a possibility that when we driver.findElements() there could be duplicate elements returned and as well sometimes no elements returned (null). So list is the best possible return type for findElements method.

Similarly, why driver.getWindowHandles(); is made to return Set. Is because, every window will have unique window handle and cannot be duplicate and cannot be null.

That is the reason why driver.findElements()  is made to return List and driver.getWindowHandles(); is made to return Set. 

Hope this blog has been useful to you.

Youtube channel: https://www.youtube.com/user/srinivaskinik
Facebook page: https://www.facebook.com/srinivaskinikalmady/

Monday, 10 September 2018

What is the difference between switchTo().defaultContent() and switchTo().parentFrame() in Selenium


switchTo().defaultContent() - will switch back to main HTML.

Where as, switchTo().parentFrame() switches to the immediate parent frame.

Let us understand through example. Below is the sample structure of html where frames are embedded inside each other. frame2 is available inside frame1 and frame3 available inside frame2.
frame3 contains dropdown1 and frame4 contains dropdown2.

frame1
     frame2
         frame3
                   select dropdown1
         frame4
                   select dropdown2


Now to work on first dropdown and then second dropdown this would be the code.

driver.switchTo().frame("frame1");
driver.switchTo().frame("frame2");
driver.switchTo().frame("frame3");
// select dropdown1 code

driver.switchTo().parentFrame(); // switched to frame2 frame
driver.switchTo().frame("frame4");
// select dropdown2 code

if switchTo().parentFrame();  not used, this would be the code:

driver.switchTo().frame("frame1");
driver.switchTo().frame("frame2");
driver.switchTo().frame("frame3");
// select dropdown1 code

driver.switchTo().defaultFrame(); // switched to main html
driver.switchTo().frame("frame1");
driver.switchTo().frame("frame2");
driver.switchTo().frame("frame4");
// select dropdown2 code

So this way, by using switchTo().parentFrame() it saves few lines of code compared to using defaultFrame() all the time.


Hope this blog has been useful to you.

Youtube channel: https://www.youtube.com/user/srinivaskinik
Facebook page: https://www.facebook.com/srinivaskinikalmady/


Thursday, 6 September 2018

What is the difference between Action and Actions in Selenium

Technically Action - is an interface and
Actions is a class.

We can use Actions class to perform complex actions such as drag and drop, click and hold, move to element, context click and double click, press keys (Control, ALT or Shift) or release them and so on.

Actions class support following methods (Important ones I have listed):

click() - click at current mouse position
click(WebElement) - click on web element passed. 
clickAndHold() - click and hold from current mouse position
clickAndHold(WebElement) - click and hold web element passed
contextClick() - context click at the current mouse position
contextClick(WebElement) - context click on web element
doubleClick() - double click at the current mouse position
doubleClick(WebElement) - double click on web element
dragAndDrop(WebElement source, WebElement target) - drag and drop from source to target. 
keyDown(java.lang.CharSequence key) -- Press modifier keys such as CTRL or ALT or SHIFT key.
keyUp(java.lang.CharSequence key) -- Release  modifier keys such as CTRL or ALT or  SHIFT keys. 
moveToElement(WebElement target) - move to web element passed. 
build() - generates composite action. Used after providing multiple actions. 
perform() - executes all composite actions. 
release() - release on the current mouse position. 
release(WebElement) - release on the target web element
sendKeys(java.lang.CharSequence... keys) - send keys such as ENTER, ARROW_DOWN and so on. 
sendKeys(WebElement target, java.lang.CharSequence... keys) -- send keys on web element such as ENTER, ARROW_DOWN and so on. 


Note:


  • The perform() method internally calls build() method, which returns Action interface and then calls perform defined in Action interface. 
  • So, either we can call build() method and then perform() method, or we can directly call perform() method without calling build() method. 


How to schedule RFT (Rational Functional Tester) scripts to run using Jenkins / schedule

How to schedule RFT (Rational Functional Tester) scripts to run using Jenkins / schedule 1. Create a batch file with following content ...